


Hurricane Season Roof Preparation Guide – Florida Homeowners

Hurricane Roof Preparation Guide for Florida Homeowners: How to Protect Your Roof This Hurricane Season
Preparing a roof for hurricane season in Florida requires targeted actions that reduce wind uplift, prevent water intrusion, and simplify post-storm recovery. This guide explains practical pre-season steps, roofing material choices, code-driven reinforcement, wind mitigation methods, and post-storm insurance and emergency repair workflows so homeowners can make informed decisions and prioritize safety. Florida homeowners face hurricane season from June 1 to November 30, and early preparation delivers measurable reductions in damage, repair cost, and downtime for both residential and commercial properties. Readers will learn a clear step-by-step pre-season checklist, material comparisons (metal, tile, impact-resistant shingles), applicable Florida code considerations such as HVHZ and WBDR, specific wind-mitigation techniques, and the immediate actions to document damage and arrange emergency tarping after a storm. Throughout the article, keywords like hurricane roof preparation, prepare roof for hurricane, wind mitigation inspection Florida, and storm damage prevention are integrated with technical explanations and actionable lists so you can quickly apply each recommendation to your home or property.
What Are the Essential Steps to Prepare Your Roof for Hurricane Season in Florida?
Preparing a roof for hurricane season means identifying vulnerabilities, reducing debris and loose elements, and confirming structural connections that resist uplift. Early-season preparation focuses on inspection, drainage clearing, tree management, fastening and sealant checks, and targeted wind-mitigation upgrades to strengthen roof-to-wall ties. These steps reduce the risk of wind-driven failure, secondary water damage from blown-off coverings, and prolonged exposure that complicates insurance claims. Follow the stepwise checklist below to ensure a systematic approach before a storm threat escalates.
This checklist contains the core pre-season actions homeowners should complete.
- Schedule a professional roof inspection early in the season to assess shingles, flashing, vents, and attic conditions.
- Clear gutters and downspouts and remove roof and yard debris to prevent water backup.
- Trim trees and remove loose items from rooflines and yards to reduce impact and projectiles.
- Secure or replace loose shingles, tiles, flashing, and roof penetrations to limit uplift points.
- Install or evaluate wind-mitigation features such as hurricane straps/clips and secondary water barriers.
These steps prioritize inspection and mitigation first, then maintenance and upgrades, which leads naturally to how to schedule and what to expect from a professional inspection.
How to Schedule a Professional Roof Inspection for Hurricane Readiness
A professional roof inspection for hurricane readiness evaluates visible coverings, roof deck attachment, flashing integrity, penetrations, attic ventilation, and the condition of gutters and downspouts. Inspections follow a scope that includes exterior roof surface checks, flashing and sealant reviews around chimneys and vents, attic inspection for deck sheathing and evidence of past leaks, and verification of roof-to-wall connections.
A typical timeline is to schedule pre-season inspections in spring and additional checks after any severe weather events; contractors normally provide a written report with photos, prioritized repair recommendations, and an estimated timeline for fixes. Homeowners should look for inspectors who reference applicable Florida Building Code criteria and can deliver documentation suitable for insurance and wind-mitigation rebate or discount programs. Knowing what the inspector will deliver helps you plan repairs that reduce vulnerability and streamline any future claims.
What Are the Key Roof Vulnerabilities to Identify Before a Storm?
Key roof vulnerabilities include loose or missing shingles or tiles, deteriorated flashing around penetrations, inadequate roof-to-wall connections, and clogged drainage systems that concentrate water.
Each vulnerability has a predictable failure mode: missing covering exposes the deck to wind and water, compromised flashing allows water intrusion around vents and chimneys, weak connections permit uplift at rafter ends, and blocked gutters cause overflows that damage eaves and soffits.
Inspecting for lifted or cracked shingles, loose ridge caps, soft decking in the attic, and corroded fasteners helps prioritize repairs based on risk. Addressing the highest-risk items first—deck attachment, flashing integrity, and drainage—reduces both direct storm damage and the chance of insurance disputes after an event.
After identifying vulnerabilities, many homeowners choose to convert inspection findings into prioritized repair or upgrade projects, which leads to selecting resilient materials.
For homeowners who prefer professional support, American Masters Roofing & Restoration offers roof inspection and repair services across Florida service areas including Melbourne, Tampa, Sarasota, Cape Coral, Boca Raton, Orlando, and West Palm Beach. Their inspection deliverables typically include a documented report with photos and prioritized repair recommendations, which streamlines decision-making. Scheduling an inspection early in the season ensures any recommended maintenance or wind-mitigation upgrades can be completed before peak storm activity, reducing the risk of preventable damage.
Which Hurricane-Resistant Roofing Materials Are Best for Florida Homes?
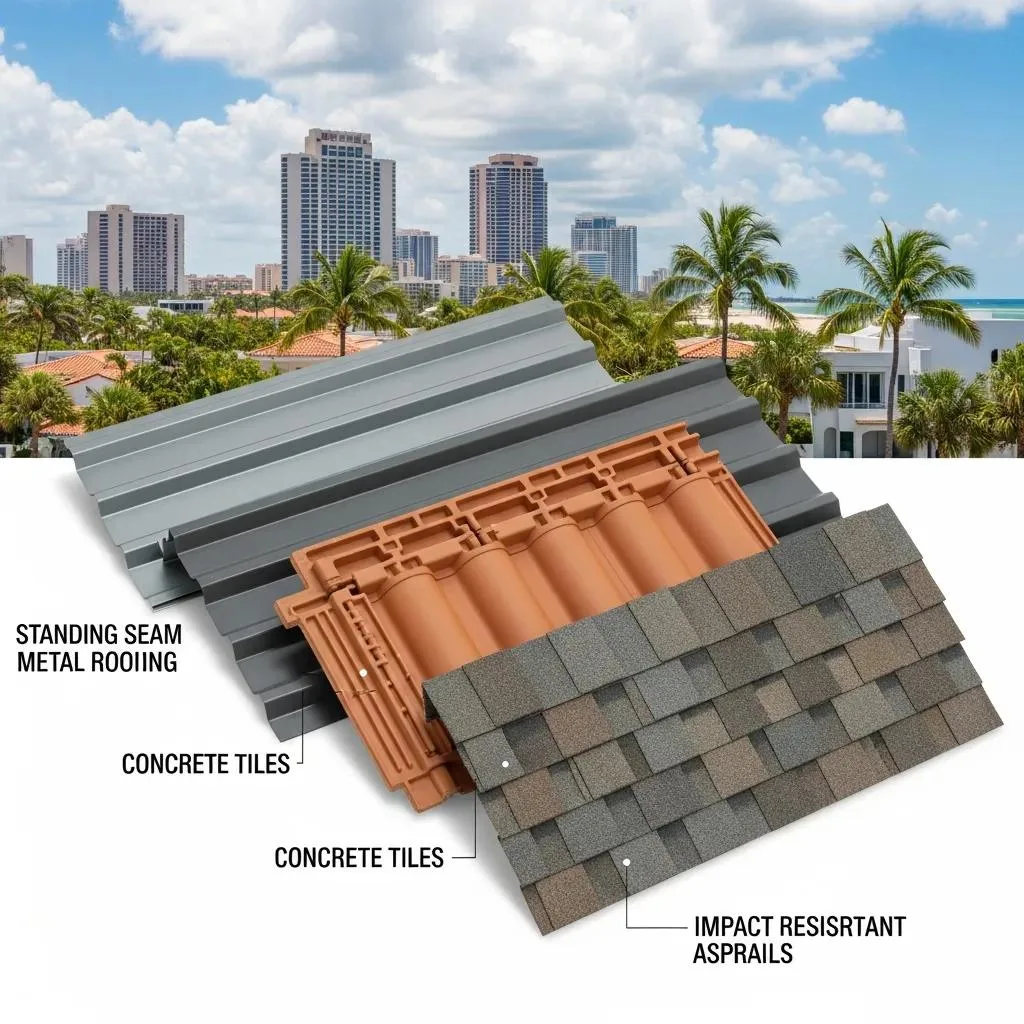
Choosing hurricane-resistant roofing materials means balancing wind performance, longevity, maintenance, and energy efficiency to match your roof geometry and zone classification. Materials commonly selected for Florida include metal roofing, concrete or clay tile systems, and impact-resistant asphalt shingles; each offers distinct trade-offs in wind rating, weight, lifespan, and maintenance. The right choice depends on roof slope, structural capacity, local wind zone (HVHZ vs. other zones), and homeowner priorities for durability versus upfront cost. The comparison table below summarizes the typical attributes to help guide material selection.
Compare common roofing materials across wind performance, lifespan, cost range, and maintenance.
This table highlights how metal excels for wind and energy, tile for longevity with structural considerations, and impact shingles for cost-effective retrofits. The next section outlines metal roofing benefits in more detail.
What Are the Benefits of Metal Roofing for Hurricane Protection?
Metal roofing provides high wind resistance when installed with appropriate fastening schedules and underlayment, and many metal profiles meet or exceed common hurricane wind ratings. Its continuous panels or interlocking seams reduce the number of exposed uplift points compared with individual shingles or tiles, lowering the probability of blow-off in sustained winds. Metal is also durable with long service life, low maintenance, and strong reflectivity that improves attic temperature control and reduces cooling loads. For homes considering solar, metal roof systems are compatible with many mounting approaches, and the lightweight nature relative to tile often avoids structural reinforcement. The combination of wind performance, longevity, and energy benefits makes metal roofing a top choice in high-wind regions when budgets and roof framing allow.
How Do Impact-Resistant Shingles and Tile Roofing Enhance Storm Durability?
Impact-resistant shingles are engineered to withstand projectiles and reduce shingle fracture, using tougher mat layers and modified asphalt formulations to meet Class 3 or Class 4 impact ratings. These shingles are often the most economical option for upgrading an existing roofing system to improve hail and debris resistance while keeping deck weight minimal. Tile roofing—concrete or clay—offers long lifespans and excellent weather resistance but requires careful fastening and clip systems to resist uplift; tiles perform well when installed to meet HVHZ or WBDR fastening protocols. Choosing between impact shingles and tile depends on structural capacity, desired lifespan, and aesthetic preferences; installers must evaluate deck condition and attachment methods before recommending one system over another.
Before committing to material upgrades, homeowners should request material-specific quotes and scope from qualified contractors who can assess deck condition and recommend the optimal system for wind and code compliance.
How Do Florida Building Codes Affect Hurricane Roof Preparation?
Florida building codes set minimum requirements for how roofs are attached, sealed, and protected in different wind and debris regions, and compliance directly influences a roof’s ability to survive a hurricane. Key code areas affecting roof preparation include fastening schedules for roof sheathing, underlayment and secondary water barrier requirements, and roof-to-wall connection standards that reduce uplift. Understanding whether a property falls in a High Velocity Hurricane Zone (HVHZ) or a Wind-Borne Debris Region (WBDR) determines both material choices and installation methods; meeting or exceeding these standards also affects permitting and inspection requirements for repairs and replacements. Homeowners who prepare their roofs with code-aligned improvements often reduce the risk of denied claims and improve overall resilience.
- Fastening schedules specify nail size/type and spacing for deck attachment to resist uplift.
- Underlayment and secondary water barriers are required to limit water intrusion if coverings fail.
- Roof-to-wall connections and ties (straps/clips) reduce the chance that the roof will separate from the structure.
These code-driven items point directly to practical upgrades you can prioritize, which are detailed in the following subsection.
What Are the Key Florida Building Code Requirements for Roof Reinforcement?
The Florida Building Code emphasizes robust deck attachment via specified fastening patterns, underlayment standards, and the use of approved roofing materials with documented product approvals. Fastening schedules require specific nail types, spacing, and patterns to achieve uplift resistance commensurate with local design wind speeds, and underlayment or secondary water barriers must be installed to limit interior water damage when coverings are compromised. Permitting and inspection are typically required for substantial repairs or full replacements to verify code compliance, and homeowners should keep copies of permits and inspection reports for future insurance interactions. Practical takeaway: repairs that follow code fastening and underlayment protocols make the roof measurably more resistant to wind and water damage and simplify post-storm claims.
How Does Compliance with HVHZ and WBDR Zones Improve Roof Resilience?
HVHZ and WBDR designations indicate elevated wind speeds and debris threats and therefore require stricter product approvals and installation methods, such as enhanced fastening, impact-rated coverings, and tested roof-to-wall connectors. Compliance with zone-specific requirements leads to fewer points of failure during extreme events and often aligns with manufacturer warranties and Miami-Dade Notice of Acceptance (NOA) listings that validate product performance. Meeting or exceeding zone requirements can also influence insurance underwriting and premium calculations, as insurers may view compliant upgrades as lower-risk. Understanding your property’s zone and targeting upgrades to meet those standards improves resilience and long-term cost-effectiveness.
Mapping zone requirements to specific upgrades—like switching to impact-rated coverings and adding straps or clips—creates a clear upgrade path that integrates with wind mitigation inspections and code compliance documentation.
What Wind Mitigation Techniques Can Strengthen Your Roof Against Hurricanes?
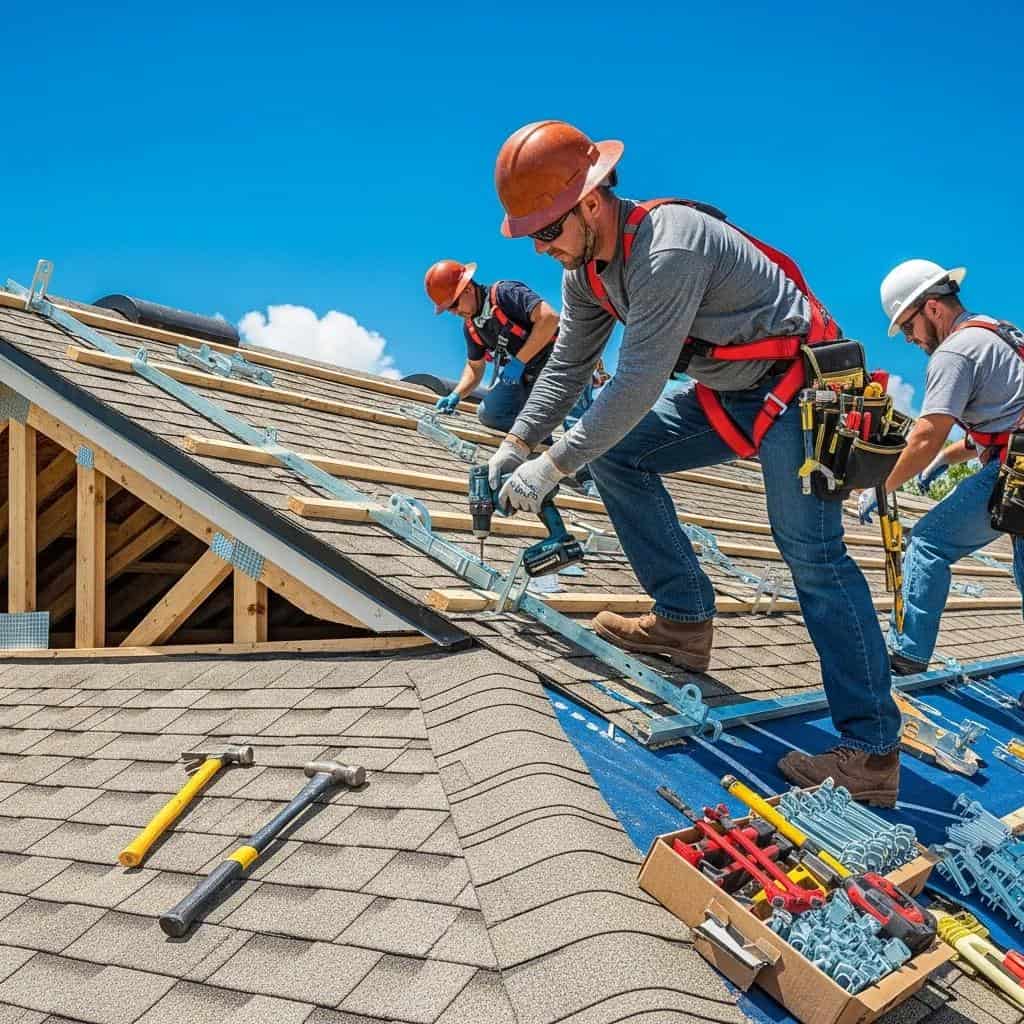
Wind mitigation techniques focus on reducing uplift forces, preventing deck separation, protecting slopes and gable ends, and stopping water entry when coverings are compromised. Techniques range from hurricane straps and clips to upgraded deck fastening, gable-end bracing, and installation of secondary water barriers that keep interiors dry despite exterior failure. Properly implemented mitigation measures increase expected uplift resistance, lower the chance of complete roof loss, and reduce the extent of secondary water damage—delivering insurance and safety benefits. The comparison table below summarizes common mitigation options, expected performance, and typical considerations for homeowners.
This comparison shows straps/clips and deck fastening provide the largest gains in uplift resistance, while secondary water barriers mitigate interior damage even when the primary covering fails. Next, explore how straps and clips function.
How Do Hurricane Straps and Clips Reinforce Roof-to-Wall Connections?
Hurricane straps and clips mechanically tie the roof framing to wall top plates, transferring uplift loads from the roof into the building structure and preventing separation under high wind. Installed at rafter or truss ends, these connectors replace or supplement toe-nailing with engineered metal hardware designed to resist specified uplift forces; they are often a cost-effective retrofit where access permits. Performance depends on proper anchorage into framing, compatibility with sheathing and decking, and whether the hardware meets applicable code approvals for HVHZ or WBDR. Regular inspection of connectors for corrosion or loosening is important, and when straps cannot be retrofitted effectively, more extensive deck or framing work may be recommended.
What Are Advanced Roof Deck and Gable End Reinforcement Methods?
Advanced deck reinforcement includes sheathing upgrades, use of ring-shank nails or screws per fastening schedules, and adding continuous blocking or diaphragm enhancements to improve stiffness and load paths. Gable-end reinforcement focuses on bracing the gable framing, reinforcing rafter connections, and adding blocking to prevent collapse or flutter under wind loads. In some cases, full deck replacement with thicker or higher-grade sheathing and a properly engineered fastening pattern is the recommended solution to meet modern code wind-resistance levels. Determining whether targeted fastening upgrades or full replacement is necessary requires an inspection of current deck condition, nailing patterns, and connection details.
American Masters Roofing & Restoration can assess wind-mitigation needs and install straps, clips, deck fastening upgrades, and gable bracing to align with code expectations; homeowners can request a wind mitigation assessment to prioritize interventions based on return on resilience.
How Can Florida Homeowners Navigate Insurance and Emergency Roof Repairs After a Hurricane?
After a hurricane, immediate priorities are safety, documenting damage comprehensively, applying temporary protections like tarping to limit further water intrusion, and initiating timely communication with insurers. A clear workflow—photographing damage, obtaining a professional inspection report, securing temporary tarping, collecting repair estimates, and filing a claim—facilitates more effective claim resolution and speeds permanent repairs. Contractors experienced with storm response can assist with emergency tarping, detailed documentation for adjusters, and prioritizing repairs that preserve evidence for coverage decisions. The documentation EAV table below outlines essential items to collect for a robust claim and recovery timeline.
Collecting these items quickly preserves evidence, clarifies scope for adjusters, and helps avoid common delays. The next subsections cover the claims process and emergency tarping specifics.
What Is the Process for Documenting Roof Damage and Filing Insurance Claims?
Documenting roof damage begins with safety checks, then thorough photographic records of the entire roof, up-close images of impacted areas, and interior shots showing leaks or structural effects. Homeowners should obtain a professional inspection report detailing the cause of damage, scope of needed repairs, and estimated costs; this report is crucial when communicating with adjusters and avoiding misunderstandings about pre-existing conditions. File claims promptly as insurers often have time-sensitive requirements, and provide the documentation packet—photos, inspection report, and estimates—to the adjuster. Working with a contractor experienced in claims assistance improves the clarity of the repair scope and can expedite approvals for emergency and permanent repairs.
When and How Should You Arrange Emergency Roof Tarping and Temporary Repairs?
Emergency tarping is appropriate when there is active water intrusion, large open areas of missing cover, or immediate risk to interior finishes and occupant safety. Temporary repairs and tarping are intended to limit additional damage until permanent repairs can be scheduled and approved by insurers; these actions should be documented with photos and invoices to support claims. Select emergency services that issue written receipts and describe the temporary scope clearly; confirm that the tarp is secured to avoid further wind-related loss. Transitioning from temporary to permanent repair typically requires a follow-up inspection and a detailed estimate that aligns with insurance adjuster expectations to ensure full restoration.
- Immediate Action: Prioritize occupant safety and mitigate further water intrusion with temporary measures documented for insurers.
- Documentation: Capture time-stamped photos before and after temporary repairs to preserve evidence.
- Professional Follow-Up: Arrange a licensed inspection and detailed estimate to move from temporary mitigation to permanent restoration.